
Installing the Arduino IDE including ESP8266 support
For the IoT Lab at the Developer UnConference in January in Zurich this is how you should prepare your laptop or Mac:
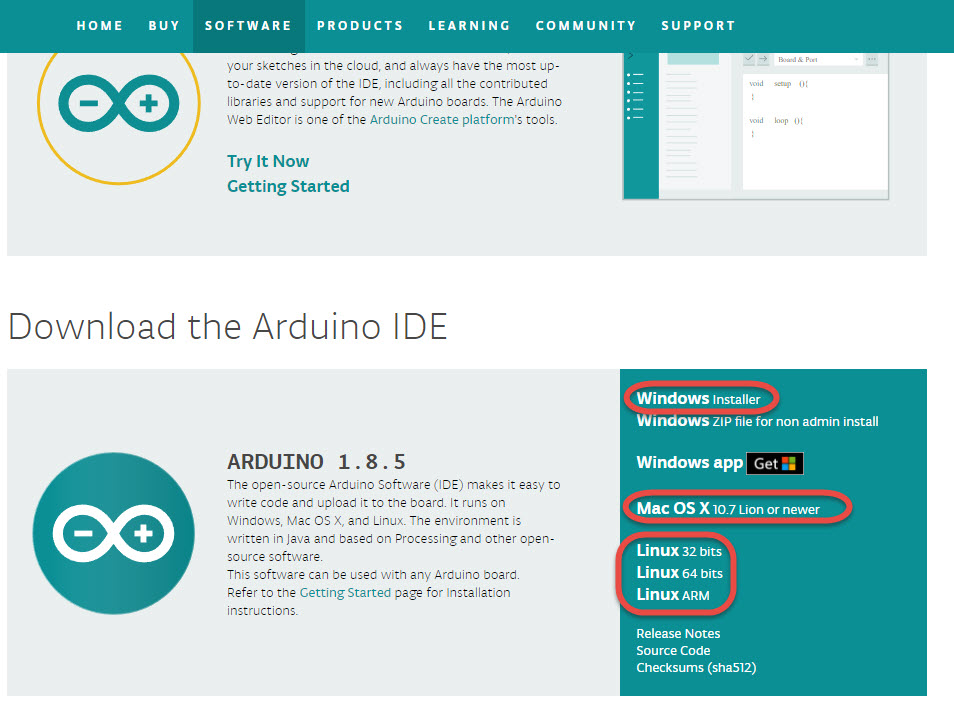
Install the Arduino IDE from https://www.arduino.cc/en/Main/Software.
Chose your platform and install:
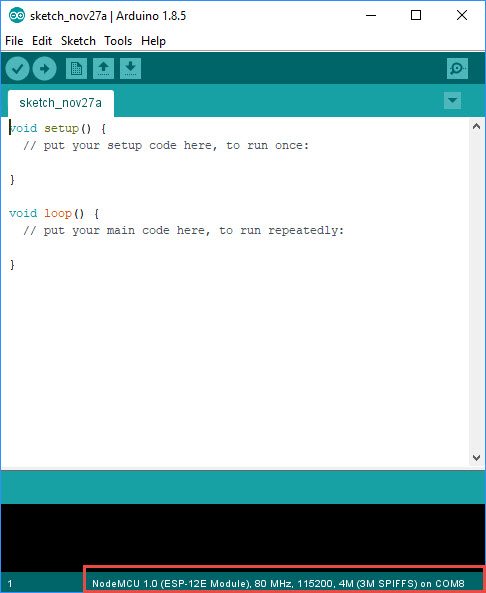
Startup the Arduino IDE. It should look like that:
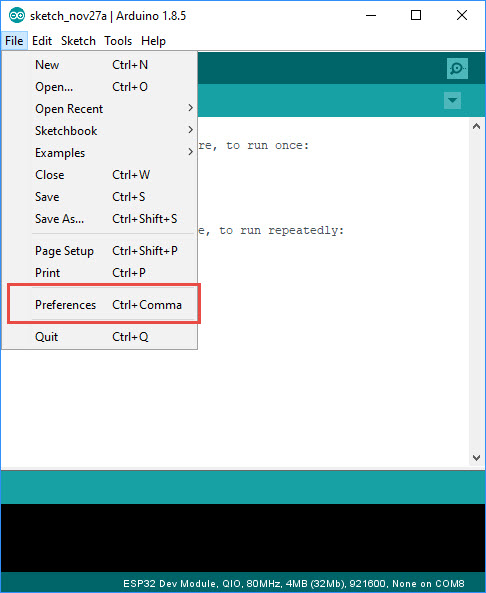
Goto “Preferences”:
Fill-in this string into this field:
https://github.com/esp8266/Arduino/releases/download/2.4.0-rc2/package_esp8266com_index.json

And hit ok.
Go to “Tools->Board:->Boards Manager”:
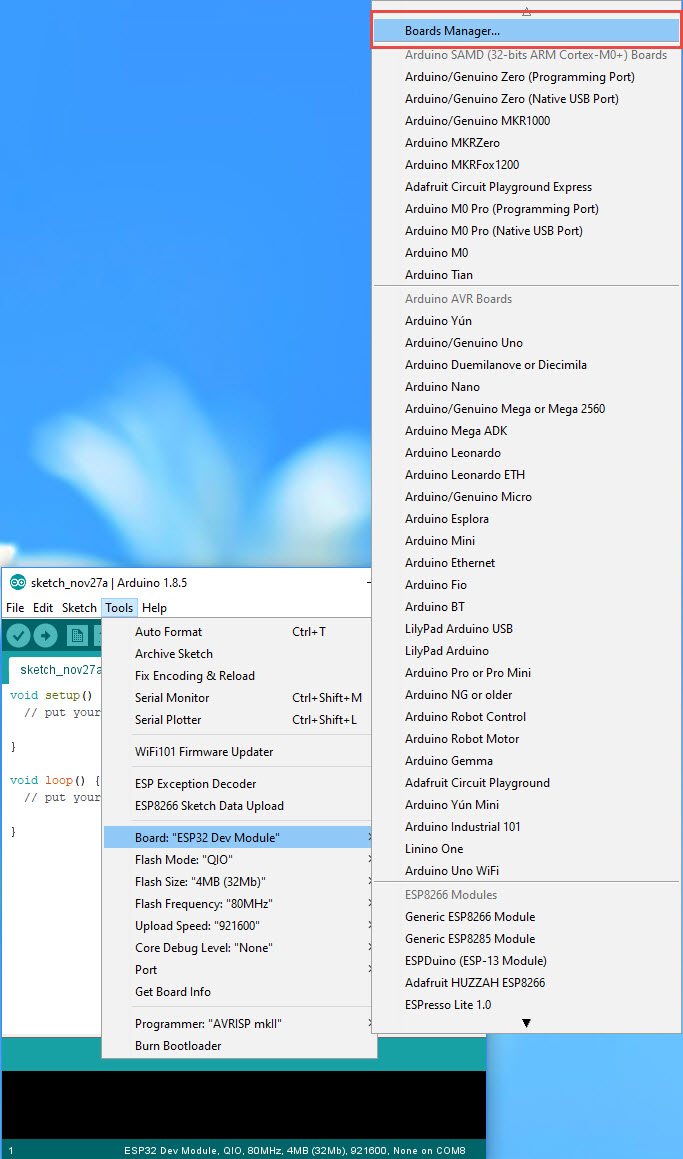
And search for “ESP8266”:
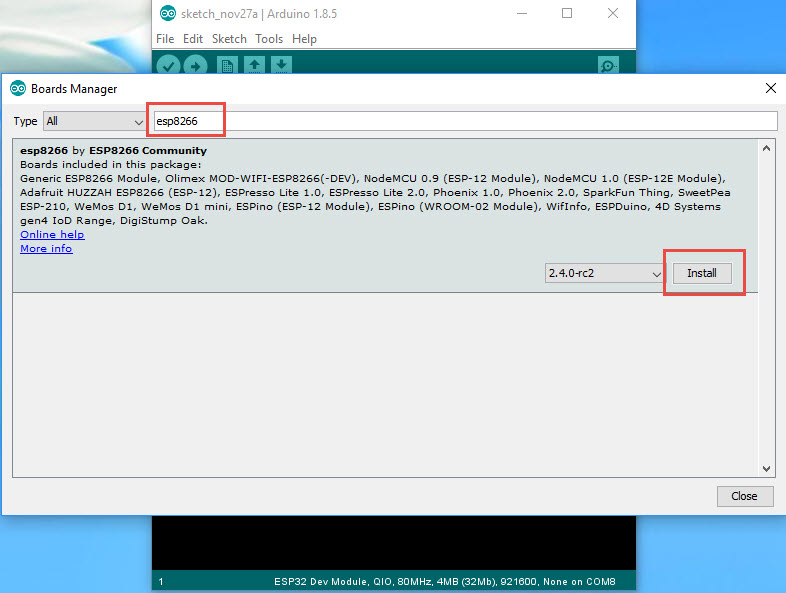
Check if a 2.4 release is selected and hit “Install”. Wait till everything is installed and hit “Close”.
Now the support for the ESP8266 chips should be installed.
Go back to Tools and boards and scroll until you find “NodeMCU 1.0” and select the line:
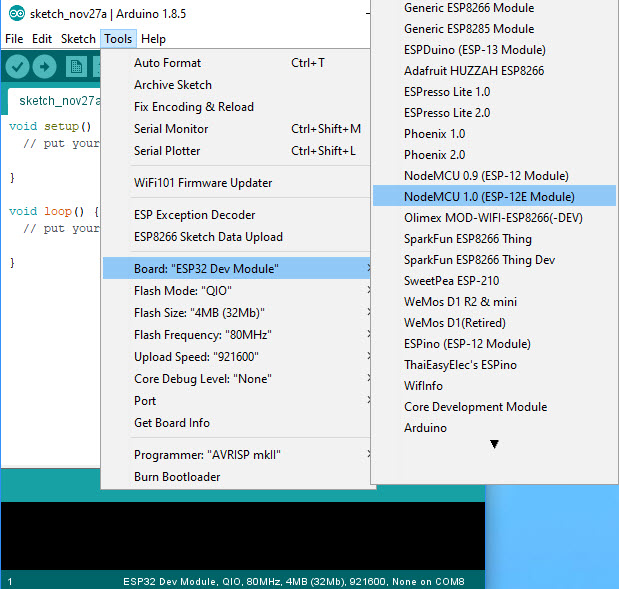
The Window will close and you should see the board in the bottom right corner of the IDE window.
Now you have to select or check the COM port:
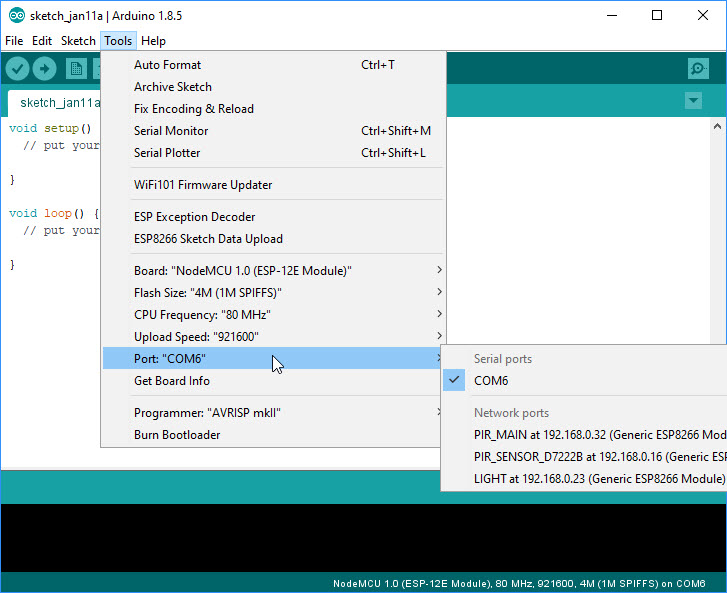
And you see it also in the bottom right corner.
The COM port is probably not the same as on my computer. No worry.
For Mac users:
Connect the WeMos Shield to the MacBook USB port.
Check whether the WeMos Shield Board shows up on the USB port by using the following commands in a terminal session
$ ls /dev/cu.*
/dev/cu.Bluetooth-Incoming-Port
$ ls /dev/tty.*
/dev/tty.Bluetooth-Incoming-Port
If you get only these result of the ls command the WeMos Shield does not show up and you should install the USB driver. To do this follow the link in this description:
see here https://github.com/adrianmihalko/ch340g-ch34g-ch34x-mac-os-x-driver
(first, run the commands to remove the driver, the I used the procedure to install the driver using the installation with Homebrew-Cask).
You have to reboot your MacOS and with a connected WeMos Shield on the USB port you should get the following result
$ ls -lart /dev/cu*.*
crw-rw-rw- 1 root wheel 21, 1 Jan 9 08:06 /dev/cu.Bluetooth-Incoming-Port
crw-rw-rw- 1 root wheel 21, 7 Jan 10 06:55 /dev/cu.wchusbserial1410
$ ls -lart /dev/tty*.*
crw-rw-rw- 1 root wheel 21, 0 Jan 9 08:06 /dev/tty.Bluetooth-Incoming-Port
crw-rw-rw- 1 root wheel 21, 6 Jan 10 06:55 /dev/tty.wchusbserial1410
And in the Arduino IDE you should see the board

Continue with Windows and Mac:
Now you hit the “OK” button and the sketch should compile:
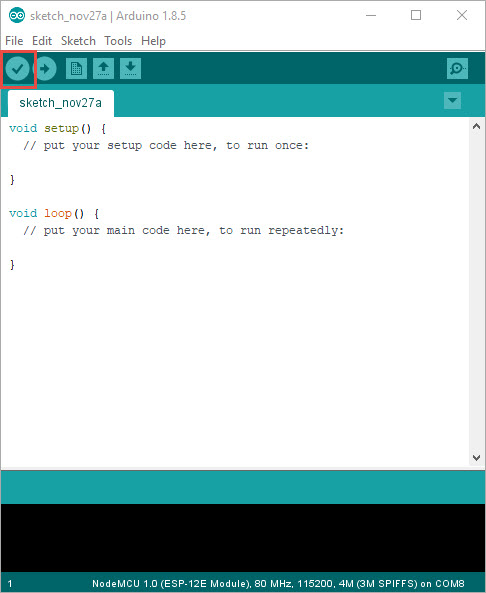
After a while, you should see “done compiling”:
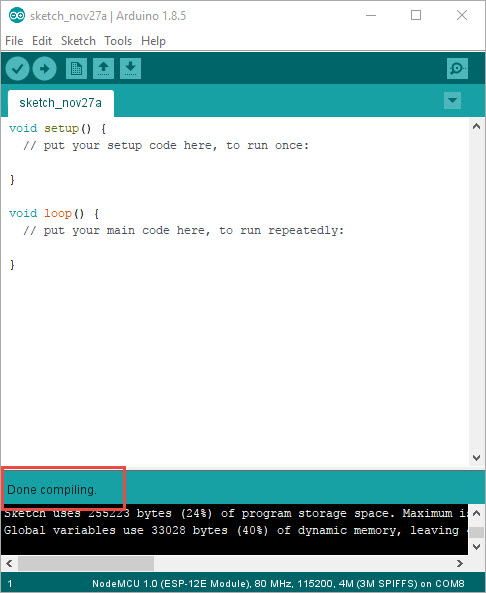
Congratulations: This is your success message and you are ready to program an ESP8266 chip.